Renewing Glue On Skins — (before you try ‘glue renew’, try this)
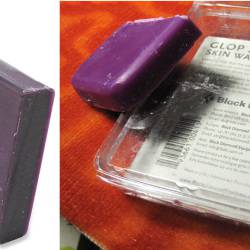
I rarely have problems with skins during the winter season. Once spring and summer arrive it is a whole different story. The problem starts with more frequent waxing going in to the spring season. Wet conditions also affect the skin glue, as does Glopstopper wax. Likewise, I find more debris in the shape and form of pine needles, dirt, and debris find there way on to skins.

While I do perform a spring maintenance on skins at the end of the spring season, such as washing them, the effects of spring and summer riding are all too obvious at the end of the season. Often skinning on wet snow (spring) will cause the glue to ball up caused by hydrolization within the glue (water trapped within the chemistry of the glue).
Eventually the skins just do not have the life they once had, and adherence problems arise. Balled up glue can also cause the skin glue to transfer on to skin-savers (cheat sheets) and often on to the board or ski surface.
The immediate remedy is to use glue renew sheets. This process involves hot scraping the old old glue off, and transferring the glue renew on to the skins. It’s a messy and time consuming process. Not to mention that glue renew will set you back $40-50. The other option is of course to just buy new skins.
However, if the plush side of your skins still have a lot of life left, there is a simpler process to get your skins back up to speed. You can heat press the existing glue with an iron and usually reverse the process of balling, hydrolyzed glue, loss of tackiness, and even surface all in one shot.
Breath new life it to your skins, here is what you will need.
- Tweezers or fingernail clippers
- Clothing iron
- Your old skin release paper sheets or parchment paper
- An old rolling pin or beverage bottle
First, it’s very important to get all the pine needles and other debris out of the skin glue. Granted, you are not going to be able to remove everything — but get the major culprits. I have an old pair of nail clippers I use to dig stuff out. Simply lay the skins flat and try to get most of the larger items. This works even better if you stick your skins in the freezer for an hour beforehand.

Next, wash the skins. This should be done occasionally in the spring anyway. Glopstopper wax residue and fluoride waxes imbed in to the skin fibers. I use a five gallon bucket with a bit a Dawn dish soap and COLD water (do not use warm or hot water). You will be amazed at just how dirty the water will be after scrubbing the plush side. Change the water as needed and repeat until the water is clear.
After washing, hang the skins and allow them to dry.
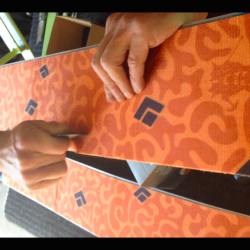
Now that the major chunks are off the glue side, and the plush side has been washed and dried, you are ready to retreat the glue. I saved my skin release sheets, but if you did not you will need to track down some parchment paper, you can find several kinds at a grocery store. Start by laying the skins flat, glue side up and attach the release paper or parchment paper on to the skin glue. Make sure you place the paper shiny side down on to the skin glue.
Next with an iron on a medium heat setting, working from one end to the other lightly press the iron on to the paper. Your working temperature will be 310-340°F (155-171°C). Waxing irons do not achieve this temp so you will need to track down a regular clothing iron. You will be working somewhere around the ‘cotton’ and ‘wool’ settings. Most clothing irons have a temperature setting for ‘cotton’ (380°F) and ‘wool (340°F). Be very careful to be within the ballpark of those temps.
You will see skin glue begin to press on to the paper (appears as a darker color through the release paper). DO NOT attempt to remove the release sheets! Use a rolling pin or beverage bottle to lightly press even pressure across the surface. Once you have the sheets pressed on to the paper and you have ironed a few laps, allow the skins to cool for a few hours. Yes, a few hours. Just because the skins feel cool to the touch does not mean the glue has finished it’s process.

During this time it’s also a good idea to clean your skin savers (cheat sheets) with a citric cleaner or solvent and a scrub brush to remove any glue residue that might be hiding in your sheets.
After a few hours, place the skins with release sheets in to a deep freezer or kitchen freezer for 30 minutes. This will make the release paper a bit easier to pull of uniformly. Once you pull the release sheets -Voila! A clean glass-looking surface of skin glue just like the looked out of the box.
I put skin-savers back on while they are cold, and put them back in the storage bag.
Eventually you will either have to glue renew or get new skins. But this process will work many times and is especially effective for skins that loose their tack or suffer from water impregnated glue. It also forces contaminants and wax residue away from the surface. You can breathe new life in to your skins several times using this method.


