Tech Tip: Cutting Skins Splitboard
Cutting Skins Splitboard
Cutting and fitting splitboard skins properly is easy and relatively painless if you follow a few easy steps. They are of course, easy to mess up if you don’t pay attention to detail. This quick step-by-step guide will hopefully make trimming your skins for a splitboard a bit easier. This guide is for Black Diamond Ascension STS (Skin Tight System) skins, although G3 and various other skin brands out there would follow similar steps. Black Diamond also makes an STD model of skins, the difference between the two is that the STS has a mounted tail clip, whereas the STD does not. If you are mounting skins with the Sparks R&D tail clip, you will use the STD version since the Sparks tail clip kit comes with a tail piece designed for the Sparks R&D clip that will be riveted on.

I prefer to use the G3 twin clips, there other other methods out there such as the Sparks R&D tail clip, Gecko tail clip, etc. The G3 tail clips are easy to adjust, and stay on in the worst conditions of touring. While you can get away with narrower skins due to the width of a splitboard, you really want to have the PE) is a Ultra High Molecular Weight (UHMW) polyethylene" class="glossaryLink " target="_blank">polyethylene base covered under the critical area at the waist of the board (directly under touring foot). For a 161 Never Summer Prospector I use a 140mm width skin, which is the size just about any splitboard will take.
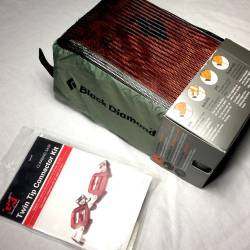
So again, this installation is for the Black Diamond STS Ascension skins, with a G3 Twin Tip Connector Kit. A three part video is included at the end of this page which covers trimming and mountain your skins from start to finish.
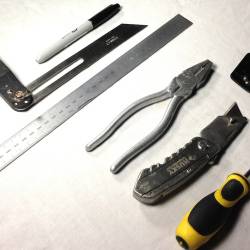
Things you will need:
- STS Skins (140mm wide)
- Tail clip (G3 Twin tip or Sparks R&D)
- Skin cutter (Black Diamond, G3, etc – included with skins)
- Sharpie
- #2 Phillips screwdriver
- Ruler or straight edge
- T-square
- Pliers
- Scissors or razor blade
Clean / Wax Base – Attach Tail Clip

You should start by making sure your board has a fresh wax, with all the excess wax removed, and structured with a brush. Make sure all dirt and debris are cleaned from the base with an orange cleaner or base cleaner and you are ready to begin.
Tip: Save the release paper from your skins! It will come in handy to recondition your skins.
Switch your splitboard in to tour mode, with the two pieces. Unpack your skins and place the G3 tail clip on the 4th or 5th notch of the tail strap (roughly center), and attach the tailpiece to the splitboard (double check you are on the tail end of the splitboard).
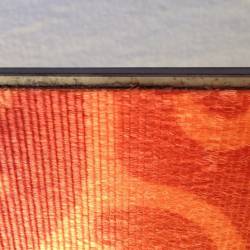
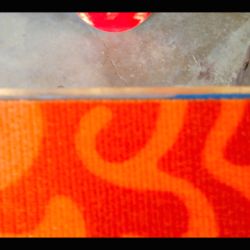
With the tail clip secured on the tail, align the factory edge of the skins so that just the metal edge is exposed, roughly 2mm, all the way to the nose on the straight side (center) of the splitboard. Remove the contact paper as you work your way to the nose of the splitboard, and keep the skins taut as you work your way down.
Tip loop adjustment
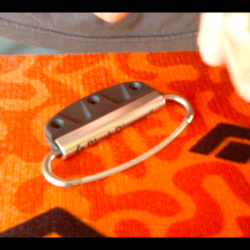
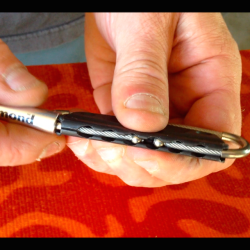
Adjust the preassembled tip loop to the smallest adjustment. You do not want a large tip loop or your skins will rest too low past the rocker of the board. Adjust the loop by removing the slider and moving the cable to the smallest settings on the cable socket. Replace the slider cover.
Mark Tip Loop
Place the tip loop over the nose and mark the ends where the tip loop metal sleeve meets each side of the splitboard nose. Transfer those marks to the skins. Using a straight edge mark a line with the sharpie between the two reference marks. Cut the skin on that line to length. Place the tip loop on to the cut end of the skin. Make sure the skin is seated squarely against the hard stop on the tip loop. Using the break-off screws provided, mount the screws through the nose clip and skins. Use a block underneath to start the screws so that you do not drive the screw into the board or work surface. Once the screws are started, raise the clip in the air and finish driving them. You do not need to over-torque the screws, just enough torque so the screw heads are flush. Break off the screw ends with a pair of pliers, the screws are designed to break-off with a few twists.
Trim Skin Width
Place the tip loop with skin over the nose of the board. Again, align the factory edge of the skin to the center (straight edge of board). This time instead off aligning the skin so that just the metal edge is showing, you will increase the offset by another two millimeters for the other side of the board (4mm from the edge).
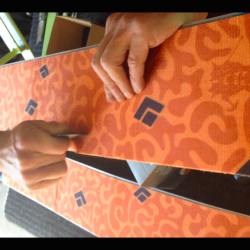
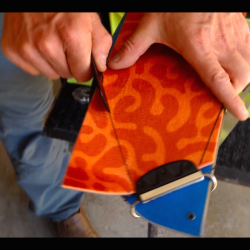
Once the skin is perfectly aligned on the one side with an additional offset (2mm or so), and is attached at the nose and tail clip, you are ready to cut the other side of the skin to width. Assure the skin is fully secured to the board base. Using the cutter provided, starting at one end, cut the contour of the skin to width following the board as a guide. Angle the cutter slightly in toward the board so that you do not get a wavy line.
Trim Nose Angle
Now pull the tail clip, and readjust the skins on to the board. You should just have the 2mm metal edge exposed on each side, with no polyethylene base showing on the majority of the center of the board. Reattach the skin so that just to the metal edges are showing and reattach the tail clip.
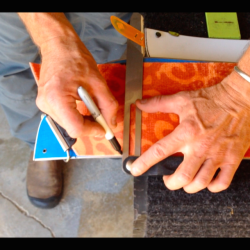
Now you are ready to trim the nose of the skins at the tip loop. Properly cut, your skins will not attract snow and ice up under the nose of the skin. First, lay the splitboard down on a flat surface. Place a reference mark with the sharpie where the nose of the board, or rocker makes contact with the surface — right at the point the nose begins to rise. Now measure up past that mark to the nose one inch and make a second mark. Transfer this second mark with a t-square to both sides of the skin.
From the tip loop edges, mark a line with the sharpie from the edges of the tip loop to the reference marks. This is your cut line. Use either the cutting tool, scissors, or a razor to cut.
Fit Cheat Sheets (Skin Savers)
Next, trim your cheat sheets (skin savers). It’s a good idea to use cheat sheets, especially for storage as it will prolong the life of the glue. The cheat sheet comes in one piece. Fold your skins with the glue side out exactly in half. Subtract an inch and cut the cheat sheets to length (two times, one for each skin). You now have two cheat sheets that are half the width of your skins. Apply the half-length cheat sheet to the front or back half of the skin and then fold the other end onto the opposite side of the cheat sheet.
Video – Cutting and Fitting Splitboard Skins
Here is a three part video of the steps above from start to finish.
See related Tech Tips
- Keep your board or skis waxed
- Always hang skins to dry completely
- Store skins with adhesive side together
- Avoiding getting snow on the adhesive

